Yes, it will be easy. Yes, you CAN do this!
So let’s get started and learn a simple way to paint an oak leaf using watercolors. But first, let me show you my palette so that you have the names of the colors.
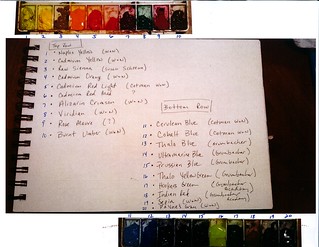
The bottom colors are hard to see, they all look dark, but you get the idea. Click for a larger view. I listed the color name and in parenthesis, the brand name. I know I should be using all the same brand names and not mix, but beggars cant be choosers. I buy what I can afford at the time and make it work.
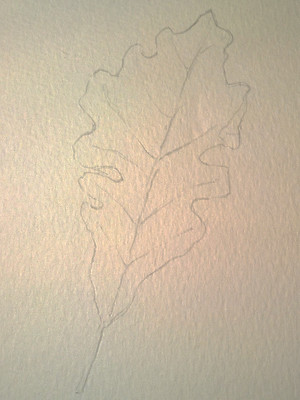
Step 1: Using a regular #2 pencil, draw the outline of the oak leaf on watercolor paper. I am using 140lb cold press watercolor paper.
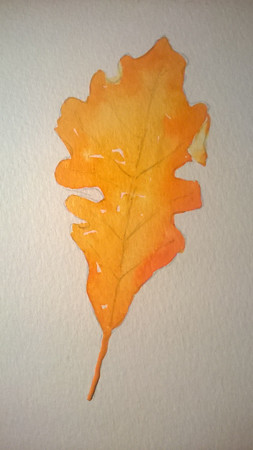
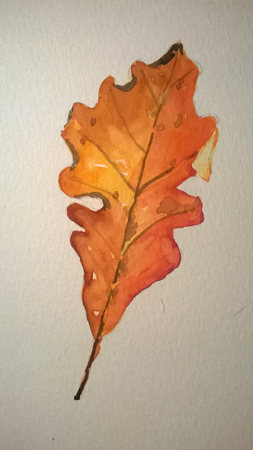
Step 2: Do not pre-wet the paper. We are working small, so there is no need to lay down water first. Paint Cadmium Orange with a medium round brush, over the entire leaf. While it was still wet, I added more orange to the edges excluding that part of the leaf that flips over like a dog ear. See how the edges of the leaf are darker?
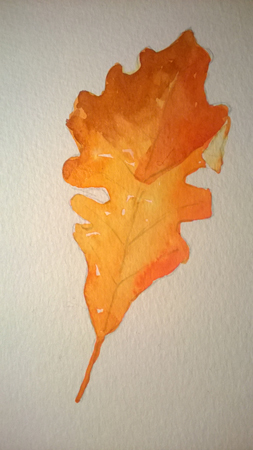
Step 3: In this step we’re going to add different colors to the edge while the leaf is still wet. In the upper left add some Burnt Umber. Watch it spread some. In the upper right hand side add some Indian Red, excluding the part of the leaf turned over. Let dry.
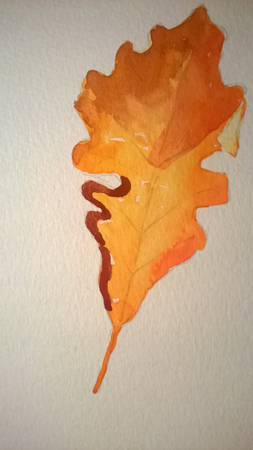
Step 4: On your palette, mix Indian Red and a little bit of Alizarin Crimson to create a rich red/brown. Make sure your leaf is dry. Paint a line on the bottom left edge of the leaf.
Step 5: Wash your brush with clean water, tap on paper towel to get excess water off. Immediately after step 4, only touch the edge of the Indian Red/Alizarin color and pull the color inward with your brush that only has water on it.
Do you see what we did here in step 4 & 5? We painted on the leaf when it was completely dry with color, then we pulled one edge of the color inward with a clean brush that only had water on it. Let’s do it again on the bottom right side…
Step 6: Ok, here we go. Paint the bottom right side of the leaf with a little line of Indian Red and Alizarin.
Step 7: Clean your brush off with water, tap a paper towel to get excess water off, then immediately touch the inner edge of the line and pull it towards the center with your clean brush. You’re doing great!
Notice we didn’t cover the whole entire leaf when we added layers to it. Remember the leaf started a solid orange. Here you can see we went around some bug holes and veins.

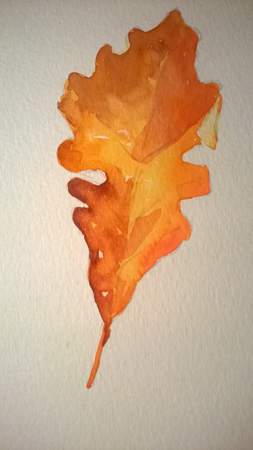
Step 8: Let dry. Next using a rigger brush and Sepia, paint in some veins and a few dark spots. Let dry.
Step 9: Here we are going to do the same thing we did in step 4 & 5 and 6 & 7. With Sepia paint a line in the upper left corner. Clean your brush. Touch the inner edge and pull color towards the center.
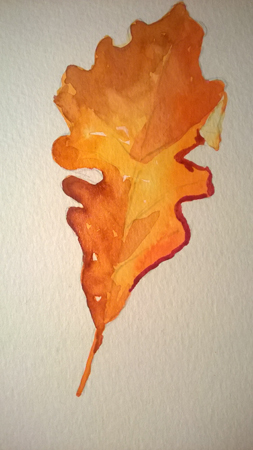
Step 10: Using Sepia and a little Cobalt Blue, paint the stem, around the bug holes, and under the edge of the leaf that is curled over.

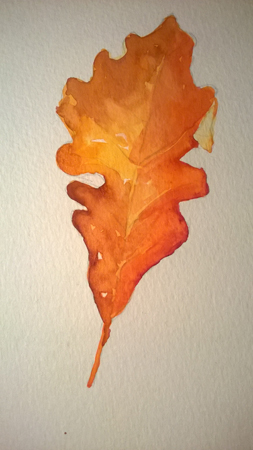
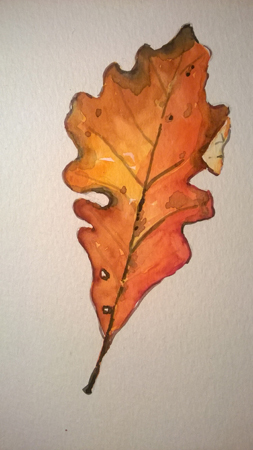
Step 11 FINAL: Watch this leaf POP!!!! We’re bringing it all together now! Like at the end of a symphony every instrument is playing!! Ha ha ha…I get so excited!
Using only Cobalt Blue, paint shadow on the right side only. And you’re done!
See you can do it! Just remember, watercolors are done in layers….lightest color first; Don’t cover the whole entire leaf, but let some orange show through, detail with darkest color at the end. Great work!
As your free autumn gift from me to you, I hope you enjoyed this step-by-step demonstration on how to easily paint an autumn oak leaf using watercolors. Now go out and collect some leaves!


Thanks, Christine. The steps were very precisely explained, the pictures were great, and I learned some new “tricks” that I plan to apply for other situations. Thanks for sharing!!!
Awesome Larry! Glad it helped. 😀
Love this tutorial. Thank you!!! ~Sophia
You’re welcome! Have fun!
Beautifully explained, Christine, and a stunning result. Thanks so much for sharing your talent and expertise! : )