I have the most amazing job ever. I’m a naturalist who has the privilege of teaching people (mostly children) about nature in my area. I give presentations on wildlife, hiking, host nature themed birthday parties, etc.
The other day I hosted an animal encounter with the theme of rabbits. During this presentation I gave facts about rabbits, introduced the attendees to our resident rabbit, and gave a step by step demonstration on how to draw your own rabbit. It was a great success.
Most of the LPN audience on this site are adults, but I thought it would be helpful to pass this demonstration on so that you may use this with your children, your homeschool class, or maybe you’re just a really cool adult who wants to have fun! So let’s go!!
This drawing is easy peasy, anyone can do this!
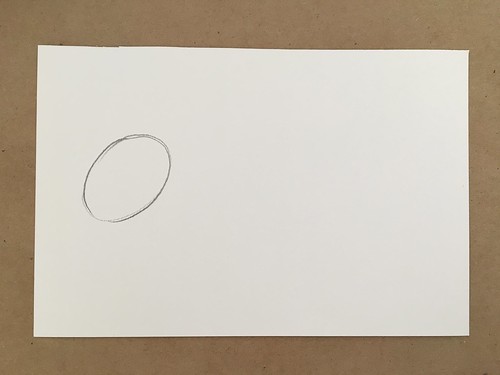
Step 1: This is a 9″ x 6″ piece of watercolor paper. Using a pencil, draw an oval the size of an egg on the left side of the paper.
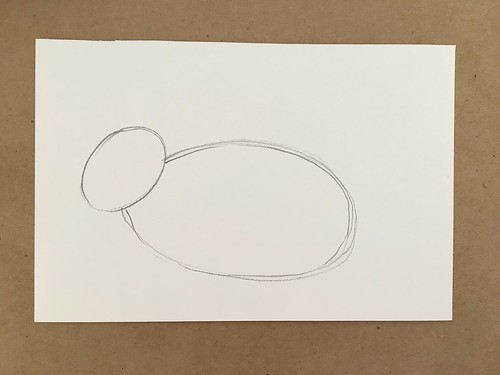
Step 2: Draw a larger oval the size of a cell phone connected to the first oval.

Step 3: Draw a circle the size of a quarter and place it at the end of the body.
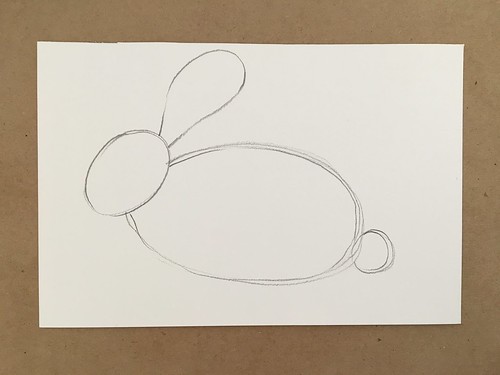
Step 4: Now draw another oval on the back of the head.
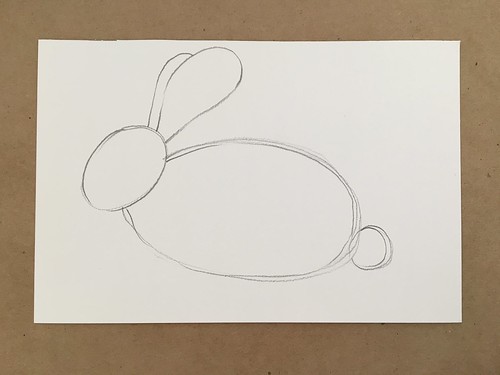
Step 5: His ear needs a buddy, so draw another half oval connected to the first. This ear is on the other side so you cannot see the whole ear.
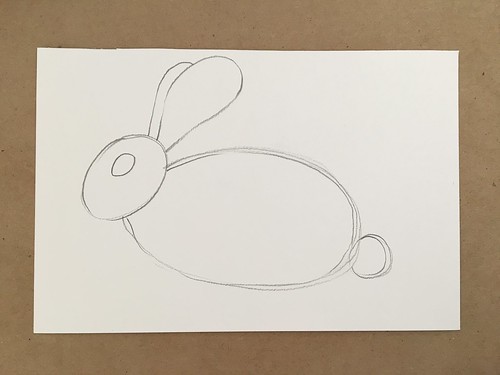
Step 6: Now let’s draw an eye the size and shape of an almond.

Step 7: For the nose, draw an upside down triangle.
Step 8: Draw three dots for whisker holes.
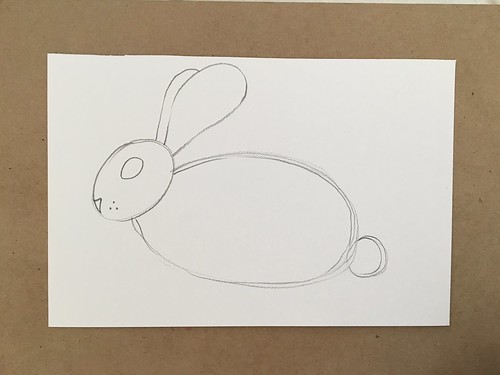
Step 9: Draw the back leg. Start at the top and make a weird S shape and connect the end to the bottom of the body near the tail. This is the most difficult part of the whole drawing. So look! The hardest part is behind you. Great job!
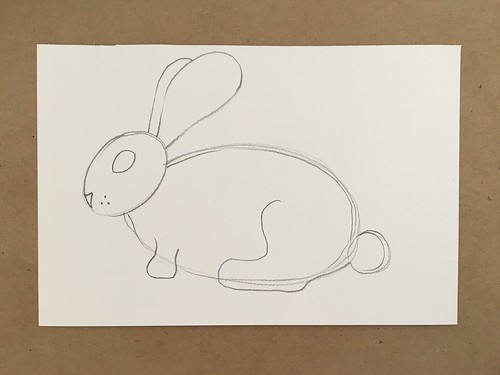
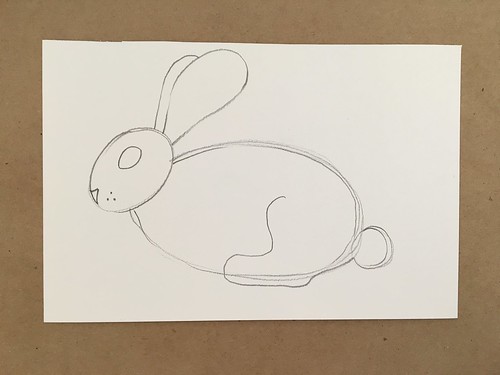
Step 10: Pretend you’re drawing the base of a tree trunk and draw a leg near the front of the body.
Step 11: He needs another one on the other side, so draw a partial leg connected to the one you just drew.

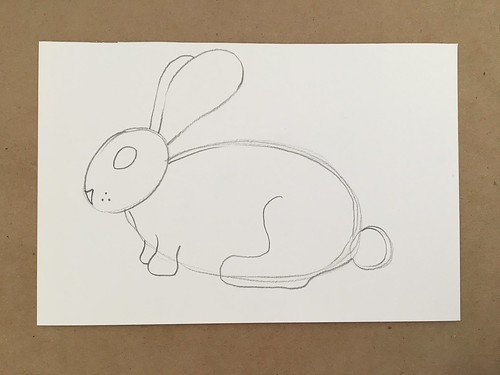
Step 12: Draw an inner oval on the large ear.
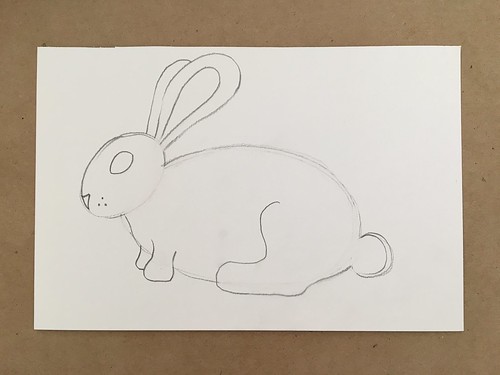
Step 13: In this step you’re going to erase some lines: his neck, on his two facing legs, his tail, and part of the large ear at its base.
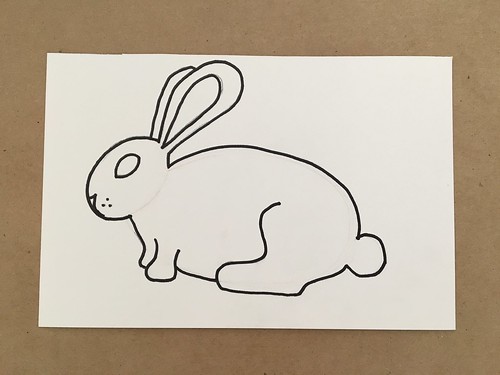
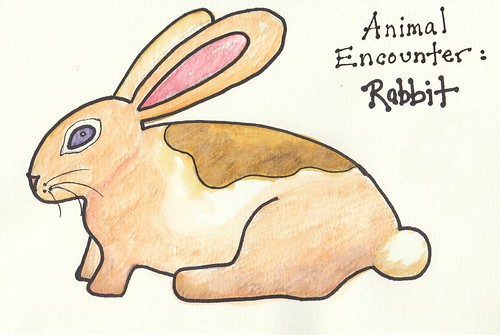
Step 14: With a waterproof marker (I used a black Sharpie) outline your rabbit profile.
Step 15 FINAL: In this step color your rabbit with watercolor pencils. After you are done coloring, take a clean wet brush and move around a color. Each time you want to go to the next color, first clean off your brush, dab it on a paper towel to get the excess water off, and touch another color moving around the pigment. In this step I also made a circle around the eye and left it white and I drew in some whiskers with a .05 black Micron pen. Make your rabbit whatever color you want! Be creative!
FUN RABBIT FACTS:
- When rabbits are happy they do a dance called a binky.
- Rabbits eat their own poop! Ewwwww! Well not really, they deposit fecal matter and cecotropes. Cecotropes are nutrient rich pellets packed with vitamins, good bacteria and fungi. It’s only the cecotropes they eat. So it’s good for them.
- When rabbits run away from their predator, they run in a zig-zag pattern. Try that on the recess playground!
- Female rabbit is called: Doe, Male rabbit is called: Buck, Baby rabbit is called: Kit
- Rabbit ears are used to cool them off. Their blood runs through the large area cooling them down. Rabbits in arid/hot regions have larger ears than rabbits in cold regions.
- Rabbits and Hares are not the same thing. Rabbits are born blind, with no fur, and dependent on their mothers. Hares are born able to see, have fur, and are mobile right away. Hares also turn white in the winter to camouflage themselves against snow. Rabbits do not do this.
Those are just some really fun facts about the rabbit. I hope you enjoyed this free demonstration on how to draw a rabbit!


Excellent!– Beatrix Potter would be proud of you!! 🐰👍