


Have you ever seen a winter sunset so gorgeous that it left you breathless? Just for a second? One particular sunset did just that as I drove home the other day. I held my breath as I admired all of the colors in the sky, for I know how quickly the sky changes from minute to minute.
What stuck me was this thin layer of deep red in between tree trunks in the distance. It was mesmerizing.
Hey! Do you want to learn how to paint this wondrous winter sunset using watercolors in 10 easy steps?
Let’s get started!

Step 1: Draw an outline. The sky is my focal point in this watercolor painting, so the horizon is 2/3rd the way down. For some reason, I really like a slanted horizon instead of a flat horizon. Maybe it’s because I’m from the most flat state in the US: Illinois!
After you draw your sketch out, wet the sky with clean water.

Step 2: While your sky is wet but not so wet that the paper is shiny, take a large flat brush and paint a few sections of yellow sky, then go around the yellow with a blue/gray mixture of paint. Do not touch the yellow paint with your brush when applying the blue/gray mixture or the colors will mix.

Step 3: Paint a red horizon. Next, paint another layer of the blue/gray mixture just above the red horizon and above the yellow patches in the sky. This will dry much lighter, so don’t be afraid of how dark it looks.

Step 4: Take some turquoise or viridian green paint and add some color to the snow. Don’t cover all of the snow, leave some pure white paper showing. I love viridian green, by the way, it’s such a good winter color!

Step 5: Using a thin flat brush and some blue/brown paint, paint many tree trunks in distance right above the snowy horizon. Don’t worry if they do not look perfect. It does not matter.
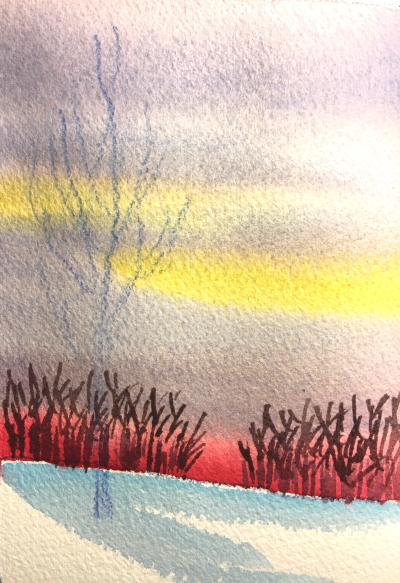
Step 6: Using a thin rigger brush, paint some branches. This too does not have to be perfect. Most of it will be covered anyway.

Step 7: Using a small round brush, paint some foliage on the trees. These could be young oaks which hold on to their dried leaves all season long.

Step 8: While the oak trees are still wet, take a cloth towel or paper towel and blot up some paint, by pressing on the paper lightly. This step gives dimension and a little bit of mystery in the background.

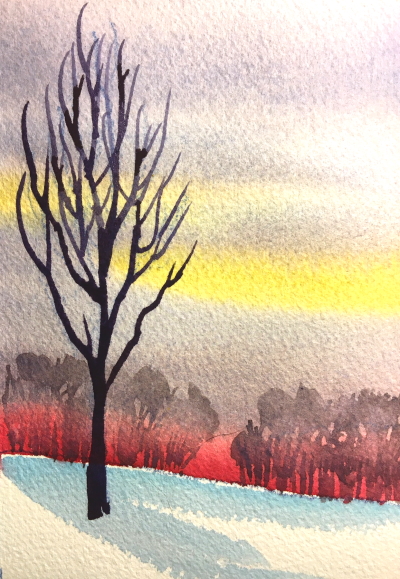
Step 9: Paint in your tree using dark colors such as: blue, purple, and brown. Don’t worry about covering every single line you made in your sketch at the beginning. Add extra branches if you want or add less. Have fun and stay loose.

Step 10 Final: Here comes the exciting part! Add a little magic snow! I used permanent white gouache paint, saturated my brush, and spattered some falling snow by tapping my paintbrush on another paintbrush. Next I painted some accumulating snow on the branches of my tree.
I hope you enjoyed this free step by step demonstration on how to paint a winter sunset using watercolors. This painting doesn’t take a long time, especially if you keep it small. You can do it! My painting was only 3.5×5″ and I’m using it for a Christmas card.
May you have a wonderful Christmas and Happy Holidays. May your 2021 be much better than 2020!
For the wages of sin is death; but the gift of God is eternal life through Jesus Christ our Lord.
Romans 6:23


Thank you for sharing this video. Best wishes to you as you celebrate Jesus birth and what it means to the world.
Thank you Danine, may you have a blessed Christmas and happy New Year!
Beautiful, Christine, and perfect for this joyous season. Hope you’re well, and many thanks for your ongoing good influence. May God bless you abundantly in the coming year– Merry Christmas!! 😊
Thank you, Mark. May you have a peaceful Christmas and wonderful 2021. God bless you, friend! Merry Christmas!