“Oh you’re such a squill!”
Try saying that to someone at work today. I did! And before they hit you say, “It means you’re a really beautiful blue spring flower!” Then run if they don’t believe you!
Well, you can always show them this site for proof.
Let’s show them how to paint that beautiful blue spring wildflower we found at Palos Woods the other day…..

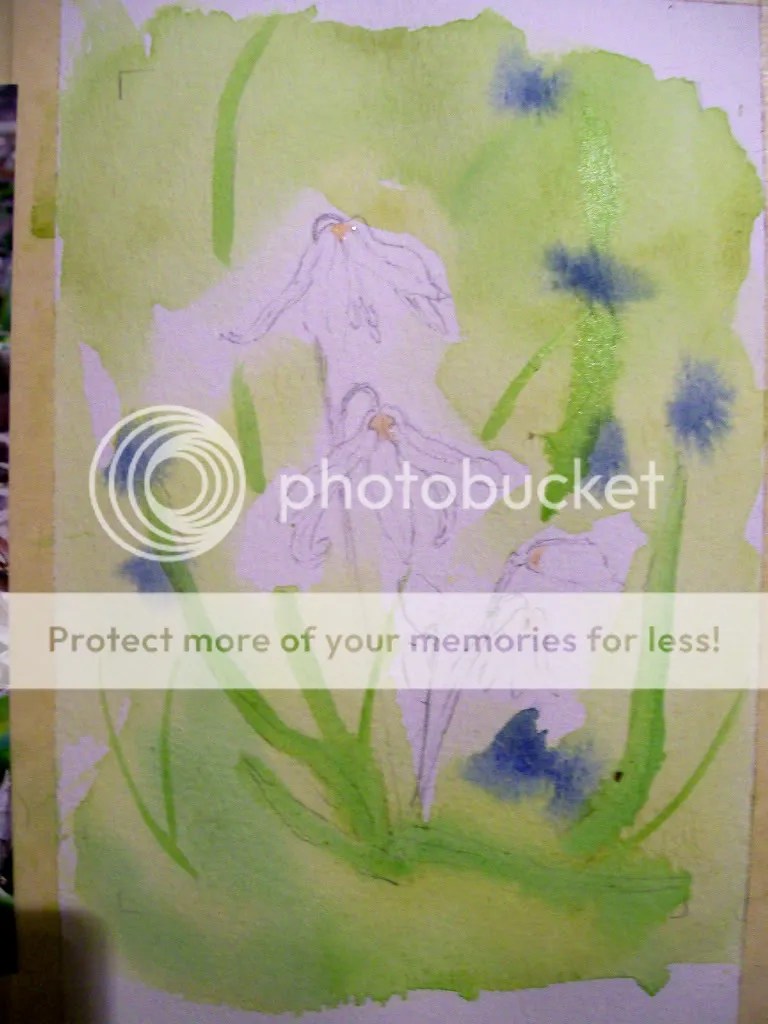
Step 1: This will be a watercolor painting. Here is my set up. On the left I have the reference photo I took the other day at Palos Woods and on the right I have a rough sketch on watercolor paper, and a green/yellow wash in the background. While wet I dropped in a few blue spots to represent squill in the distance. If you do this while wet, the blue pigment will melt into your background creating a faded affect. You will not have total control over the edges of the background flowers…and you don’t want to! Let them breath and flow where they want! Don’t worry if this step looks too dark, watercolors always dries lighter in the end.

Step 2: In this step I placed masking fluid where the stem meets the flower (there is a white spot here) and while the background was still wet I added a few leaves in the background.

Step 3:Ohhh, it’s coming together now! In this step I started to fill in the flower with a light blue and on some tips I added crimson. I also painted a few stems with a green/brown mixture.

Step 4:When completely dry, I added a layer of blue to define edges and veins. It really doesn’t matter what blue you use. Make it your own. If you like a darker blue, you have the artistic license to use it! Likewise, if you like a lighter blue…feel free.

Step 5: In this step I just added a dark green to define the foreground leaves. Don’t paint the whole entire leaf, leave the highlighted area (the part of the leaf that light hits) alone. You will see in the next step how it all comes together. Also, don’t paint every single leaf. Leave some in the distance the way they are, it will give your painting dimension.

Step 6 Final: Here is the final step. In this step I took a Micron #3 pen and outlined some leaves and petals. This step is always optional! Don’t feel you have to do this if you do not want to.
“Squill in the Palos Woods”
image: 4.5×6.5 in a white mat outside dimensions 8×10
I hope you enjoyed this step by step watercolor painting demonstration of squill, a spring wildflower in Palos Woods!

Oooh, I was so excited when I saw the title of this post ’cause I’ve been waiting for this! I wasn’t expecting it so quickly tho.
Okay-you’re amazing. If I did those blue spots for background flowers it wouldn’t look like that. Same with the green. When I do that it just looks messy – and not messy in good way, lol.
Love it!
I meant to comment about one of your cited techniques on an earlier post but failed to do so. For me personally, your final touches of accenting with the Micron pen really adds a “pop” to the painting for me. I am not sure I can put it in artistic terms. Its like a subtle mesh of a pen & ink drawing brought to life with colors….if that makes any sense. 🙂
Ooooooooooh. So pretty!
Drowsey: You’re so funny! I bet you can do those blue spots! I wish we can paint together! One tip I think I forgot to mention when doing those blue spots….when painting wet on wet (the blue spots) wait until the paper is no longer “shiney” that’s too wet. You might have to wait about 30 secs to a minute, then add the blue spots. Your spots will be perfect 🙂
Alan: Thanks so much! I too love the micron step. I think it looks a little life-less without it! Your comment means a lot! Thanks 😀
Lana: Thank you girl!
Yes – you know I don’t have enough patience for watercolour – but I do try, lol.