Today, we are going to paint an orange kitty using watercolors. Pretty simple, but the end might scare you. Don’t let it! You can do this.
I am using Hahnemühle‘s Leonardo 280 lbs matt watercolor paper, a heavy weight thick wonderful watercolor paper with much texture.
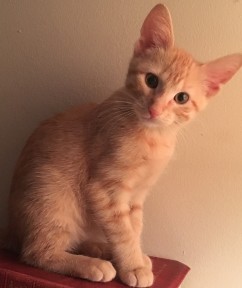
In each frame I wanted to have a picture of kitty for easy reference, however my printer is very low in ink so the picture printed really light. Nothing will set us back….so here we go!
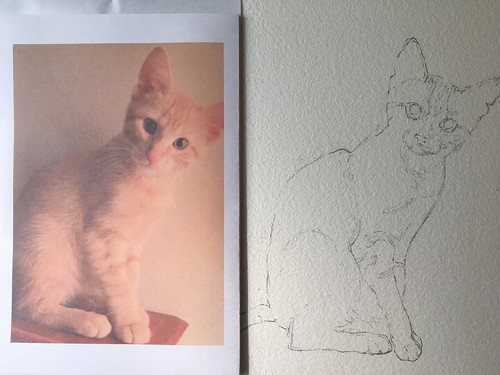
Step 1: Draw an outline in pencil. Make notations of stripes and shadows.
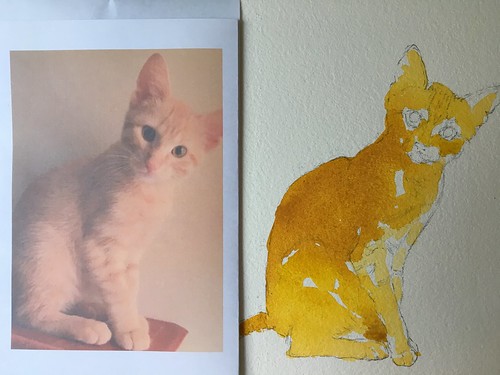
Step 2: We are only going to be using two colors: cad yellow and ochre. Paint cad yellow on the whole body except leave some white spots for the lightest highlights. Leaving white exposed also let’s your painting breath. Sounds strange, but without the white, your painting might end up too heavy. Now, while the cad yellow is wet, paint ochre on the spots where the kitty is shaded. Let dry.
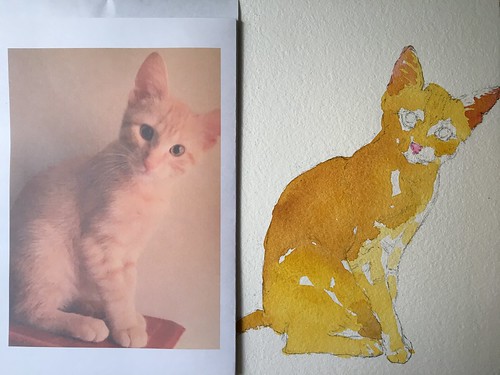
Step 3: Using rose and ochre, paint the kitty’s ear. Think of negative painting when you leave in some hair in the ears. Now, paint rose only on his cute little nose.

Step 4: Using orange, paint where the kitty looks more orange: top of head, in the shadow area, stripes on his legs. If your edges are too hard, you can soften them with a paintbrush that has clean water while the orange is still wet.

Step 5: Paint darker stripes on head and legs with brick red and orange mixed together.

Step 6: Paint the eyes with viridian green and Payne’s grey in the middle. Leave white spots exposed for the light reflecting in his eyes. Next, darken part of the ears with violet. Lastly, using some of that violet, make a small line from his nose down to his mouth and paint shadow around his lip area.
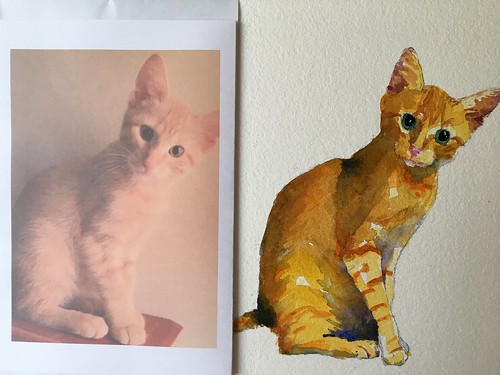
Step 7: This is the part that might scare you…. DONT BE SCARED! Just try it!!! In this brave step, we are going to take a big round brush and paint cobalt blue and violet over all of the shaded areas. That’s right, you’re going to paint right over the kitty in large chunks. Take a deep breath. Only do this step if your painting is completely dry. Shadow his left side, the left part of his face, under his right eye, under his chin, in between his legs, by his tail. Just like before, if your edges are too hard, soften with a brush that has clean water on it. Now look at him pop!

Step 8 Final: In this final step, give him something to rest on. With a large flat brush paint, underneath the kitty with violet. While wet, make shadow underneath the kitty with Payne’s gray. After everything is dry, you can outline the kitty with a black micron pen and give him some whiskers. Viola, la peinture du chat orange est fini!
I hope you enjoyed this free step by step on how to paint a cat with watercolors. The orange kitty’s name is Niles and he would be honored if you tried to paint his picture too!
Purrrrrrr, purrrrrrrr, purrrrrrr.


He really is a gorgeous kitty! Thank you for sharing your talent with us, Christine!!!
Thank you MeShell ❤
When I look at the photo, I think, impossible!! Then, you make it look so – SIMPLE! Thanks for the walk-through!
Lauri
You’re welcome! Have fun and be brave. 😊
an orange kitty … VOILA!
there is magic in this … .
Thanks Gene! That little bugger is cuter than he behaves! Ha ha
Gorgeous painting!!! ~Sophia
Thank you, Sophia! 🙂
omg!!!! I love this!!! Mainly because she looks EXACTLY like my Kiki haha. I was googling a picture of an orange kitten with white stripes and BAM there’s my Kiki awe. I want this picture sooooo bad hahaha. I’m gonna attempt to paint it!!!