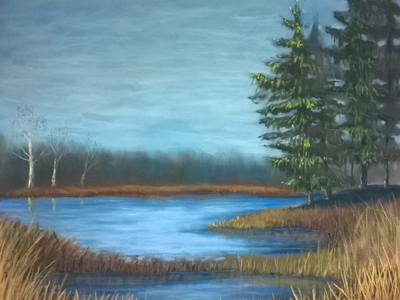
The November landscape has inspired me to create a soft pastel painting. Do you want to paint one with me? OK! Here we go!
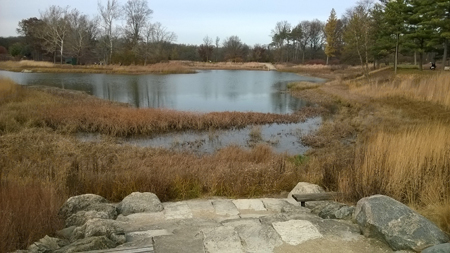
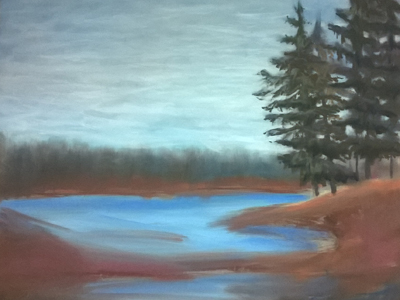
First, here is the scene that inspired me (minus the rocks)…
Now, before we begin, here is a sneak peak of all the steps in a time lapse…
Like it? YOU CAN DO THIS! Here we go.
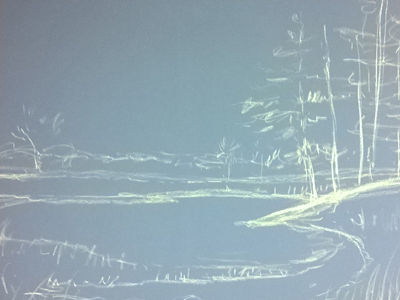
Step 1: I am using a gray Ampersand pastel board 20×16. Why gray? For no reason other than I had it laying around. Using a pastel pencil, any light color will do because this will get covered completely, draw a rough sketch. I am using Derwent Pastel Pencils. ***Note: You can use ANY pastel brands you have and any colors. You don’t have to run out and buy the brands I use. 🙂
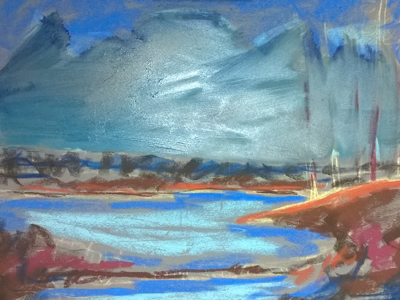
Step 2: Lay down color all over the board just to have a base to work with. Don’t worry about which color is the right color to use. Most of this will be covered. The secret to painting with pastels is, lay down “harder” soft pastels first then top with “softer” soft pastels. You will find certain brands are harder than others. I mainly use Rembrandt and Unison brands. Rembrandt is harder than Unison so they go on the bottom. However (there’s always an exception), Unison brand seems to be darker. The darkest Rembrandt can’t get as dark as a dark Unison…so if I need to go dark, I will use the Unison first.
In this step, I used all Rembrandt pastels and wasn’t too concerned with exact color.
After you cover your board, take a fat paint brush, like a cheap one you paint your walls with, and turpentine and paint over the pastel scribbles. You’re just spreading and moving the pastels around. Don’t worry about direction of brush stroke or anything.
Also, don’t worry how dark it will look. When it dries it will become lighter. Here is what it looks like dry:
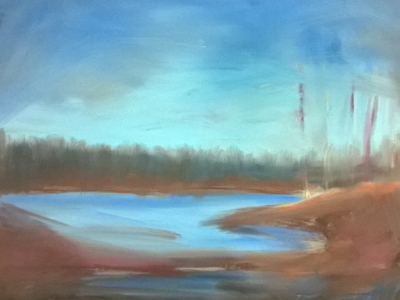
This is completely dry. This step is important because it covers a lot of ground in little time with little pastel pigment.

Step 3: Now we are going to start layering. Using Rembrandt (medium blue) #506,7 make horizontal likes in the sky near the top of the board. Then take Rembrandt (light blue) #570,9 and paint horizontal lines in the sky above the horizon and in the center.
Going lighter, paint Unison #grey 33, in the sky on top and Unison (light blue) #A53, over the horizon and center of the sky.
Time to wake up your inner child….with your finger blend these colors in the sky back and forth horizontally. Fun! I know!!

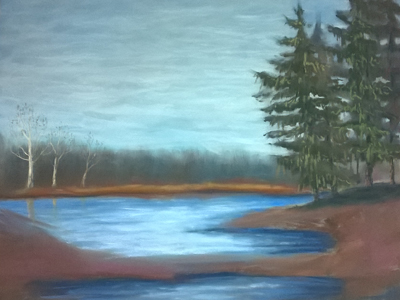
Step 4: Now we are going to paint the base of the pine trees. Using Rembrandt (dark green) #627,3 paint in some pines leaving “sky holes”. You don’t want one solid mass.
Step 5: Now I notice, I have to go much darker. So, with these colors I overlap my pine boughs Unison (dark blue) #A37, (dark green) #Green 13, (dark purple) #DK 14. Looking great!
Step 6: Here we are going to highlight the pine, here and there, not covering the whole tree. Using Unison light green, paint in some pine tips.

Step 7: Using Derwent Pastel Pencil #Spectrum 11F Orange, draw in some birch trees over the lake in the distance. Go lightly.
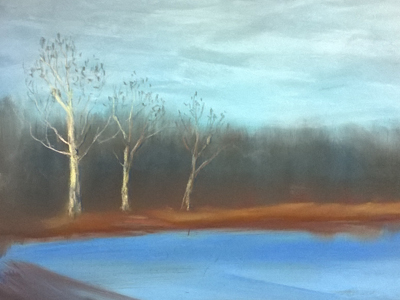
Here is a close up so you can see what they look like.
Step 8: OK! Let’s anchor those pines to the ground by painting a dark color underneath them. Using Unison (dark blue) #A50, also paint the water by the edge of the ground to darken this area. Blend with your finger. Now using that pastel pencil for the birch trees, paint in their reflection in the water.
Step 9: Using Rembrandt medium blue, like the sky and Unison (light blue) #BV8, paint over the water, lightest color in the middle. Blend with your fingers.
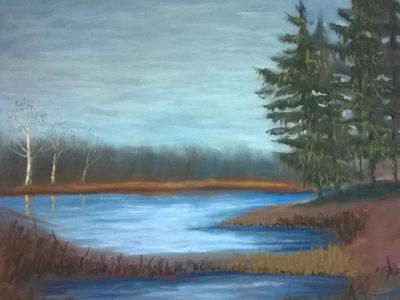
Step 10: Now we are going to start layering the grasses. Darker color on the bottom. Using Dark Brown Rembrandt #408,3 and dark blue Unison #A49 scribble in some grasses. The lighter grasses I used a medium olive green Rembrandt #227,3.
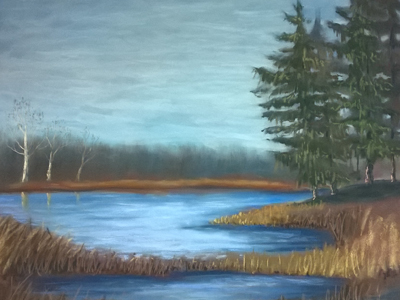
Step 11: Here we are layering the grasses with lighter colors and highlighting the pine bark. In the grass area, scribble using a light sage Rembrandt #202,3, beige Rembrandt #236,3, and yellow Rembrandt #227,5. For the pines bark, I highlighted with a red Derwent Pastel Pencil #Deep Cadmium 6D.
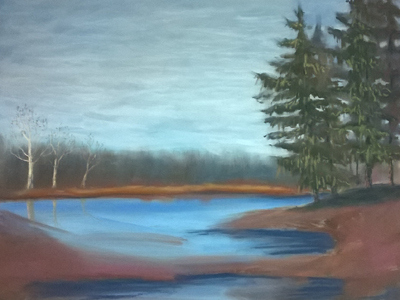
Step 12: Let’s paint the lightest blades of grass and make reflections in the water. The lightest blades are light yellow Unison #Y15. Take some of your grass colors and paint them in the water. Then, take your finger and pull down.
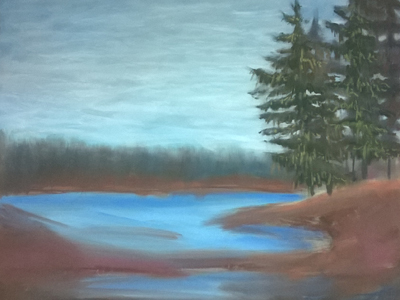
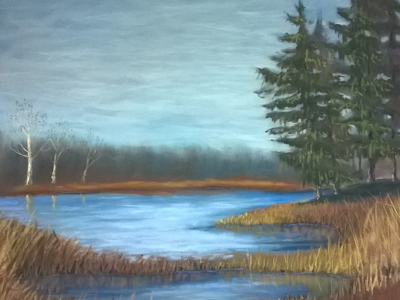
Step 13 Final: In this step I added more punch to the pines. Using a very light yellow-green Unison highlight some pine tips. Then, sneak in some other striking colors like hot pink and purple…it gives it life. And you’re done!
If you would like a print or greeting card visit below:
I hope you enjoyed this free step by step soft pastel demonstration of pines by the lake! Remember, you can do this!


You are a beautiful soul to share your gift so freely with others. Thank you!
Thank you Mirel, I’m so glad you enjoy!
Christine
Hi Christine, Yes, I do want to paint it with you. But first, thank you. It’s rare that an artist gives and encourages like you do. I have followed you for some time, so I know you are just that kind of loving and sharing person. I have some pastel pencils and want to try them out, but my composition and artistic skills are not inborn. When I’m done, I hope it will be good enough to show you 🙂 ..love Marcia in Modesto California.
Marcia, that’s wonderful! Play with those pastel pencils!! It will be good enough and I can say that before you even start, because there is no bad artwork, just wrong thinking. When you create, it’s your own kind of prayer….and that can never be not good enough!
Thank you for the kind comments my friend!
Christine
You are an amazing artist, im wondering would this be too advanced for an 8th grader (14) beacuse i would love to try pastels, and i think this woukd be a nice place to start.
Thank you Cathryene, you’re very kind! I do not think this would be too advanced for an 8th grader. Have a blast!
I did it! Wonderful occupational/art therapy while recovering from last week’s thumb joint replacement surgery.
Way to go!!!!! Sorry to hear you needed surgery (hope that went well), I’m glad you were able to “play” while in recovery.
Best wishes
Christine